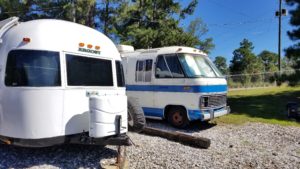
Truly, the only thing totally messed up with our vintage Argosy trailer was the bathroom. It’s old plastic, dirty walls, new toilet, new but wrong sized tub, wooden boards that were not waterproofed…..and a homemade outside shower.
This is our biggest renovation job with TarTar so this post is long.

The above picture shows the too small tub (the PO went for cheap, not accurate) and the white duct tape for the shower nozzle/head to go outside for the homemade outside shower. Luxury, right?
The PO’s PO had destroyed the entire bath setup to create more storage. The bathtub was removed and he cut through the skin to create a very poor outside shower. The PO bought a cheap tub and toilet to fix up the bath. They hung a shower curtain on the wall with tacks to prevent the wood from getting wet. There was no shower curtain around the tub like you have in your home.
Mike had no choice but to build out a wall that could hold a door to the bathroom and that meant we lost some space.


Our new outside shower box. We bought this from Camping World for $50.


Before and After:
The left side shows the super thin particle board divider (right shows the new tempered glass). Notice the ugly white duct tape. That was the “outside shower”. The Before shower also had the original Argosy/Airstream wallpaper on the back and just plain plywood on the long side. There was no shower door/wall at the end of the tub. Yikes!
The After side shows where Mike installed FRP (from Home Depot & totally waterproof) all around the tub to keep it waterproof. We also have a new fancy shower sprayer (from Camping World) along with a shampoo/conditioner/soap dispenser (because there is no room to store this stuff).
Nickster fits in the new shower! The door to the bathroom has not been installed yet. It will be on a sliding track similar to a barn door. When closed, you will not see Nick in this picture, when it slides to the right, to open, you will see Nick.
I found an eerily similar color to the original wallpaper …..as an oops can of paint for $7! The door and outside wall will be painted this color.
The Nickster helping paint the outside wall of the bathroom.

This is the finished “barn door” for the bathroom. I wish I could tell you that we are thrilled with the outcome but we are not. It seems too clunky. Instead of a hollow core door, maybe a sheet of plywood would have been better since it’s thinner. Our fix just doesn’t keep the original theme. But, I plan on living with it for our upcoming trip and then make up my mind in what to do next. One thing I know….I’m not going back to the ugly accordion door!
…..and this is just the shower! We still have to update the cabinets, walls and want to get a fancy decomposing toilet. These updates will have to wait a couple of months and up to a year.


kitcatsz, My wife and I just bought a 1972 Argosy 26 in desperate need of renovation. It is a rear bath twin model, but we would like to make some serious changes like converting it to a center bath, rear bedroom. I was really struggling with how to fit everything into the space until I saw your post about renovating TarTar’s bathroom. Now I have a serious favor to ask of you. Would you and/or Mike be willing to take some measurements and share those and some details about construction and materials with us? Dave
Dave –
We can absolutely share the measurements! We are on a non-camping vacation at the moment but when get back, I’ll take a myriad of measurements (overall, width, sink, bathtub, doorway, etc). I should be able to get it to you on Monday.
Some best guesses to get you started:
The entryway is 20″ (I know this one for sure because we added a 24″ inch door to act like a barn door). This probably does not help you much because I need to get you the measurements for the entire length of the room.
Our bathtub was a PO leftover. It is not original to Airstream/Argosy and is slightly shorter than it should be. I don’t want guess and be completely off.
We are also in the process of “converting” our back bedroom into a one bed unit. It won’t be a full conversion because we like the table in the back and use the twins as extra “couches”. We will add two boards to make it a queen bed at night & convert it back to twins during the day.
Thanks so much! You have given me renewed hope. Enjoy your vacation.
Just sent some details and a link to many photos to your email. Let me know if it did not come through or you need additional info.
Hi, I know this post was from last year, but wanted to know if I too, could get the measurements and photos to help with our Argosy renovation? If so, my email address is laracohran@gmail.com
Thank you so much in advance!
Sure! Would this post help? http://wp.me/p3knvm-ed
Thank you, so much!!!
After reviewing that post, it seems confusing to me so if I can help decipher it, just let me know. It has all the same information that was emailed to the other reader who commented. I love everything about this Argosy… but the bath. I so hate the bath and what the multiple previous owners have done to it. I just posted up another attempt to do minor fixes to it… which ended up being a Pinterest fail at https://argosytraveling.wordpress.com/2016/09/12/repainting-the-bathroom-sink/. I’m not trying to decide to re-do the entire bath or try to re-paint it to fix it.