


One Year Update: Wondering if this DIY Paint Job is still holding strong? Yes, it is! The paint finish is hard as nails, easy to clean and still has a brilliant shine all over. Friends of ours came to visit us while camping in Auburn, AL and arrived after dark. They said they saw our trailer as soon as they entered the campground because our lights were shining off the top. SCROLL DOWN to the bottom of this page to see the pictures from One Year Later….and three years later.
![]()

Super Shiny after 2nd Coat
Painting a 28ft Argosy can be a daunting task. Many send their Argosy’s out to be professionally painted but the cost can be very high. Others opt for Do It Yourself options. We opted to Do It Ourselves mostly because of the cost. There are many options for DIY’ers and we fell into dead ends along the way but finally decided on Rustoleum’s Topside paint.
Full details and pictures after the break…
Read about our Sherwin Williams Disaster and Their Poor Customer Service.
We did A LOT of research on the internet, bulletin boards, etc reviewing details and photographs of Before and After pictures. Everyone has their favorite option. Everyone has an opinion. Narrowing down which DIY’er had the best results was difficult because no one gave the full scoop on what they did. Most shared quick snippets like, “I used a foam roller with XYZ Paint and it was great.” We struggled to find complete instructions, what worked and didn’t and general tips or hints. Clearly, we are on our own once we picked our paint.
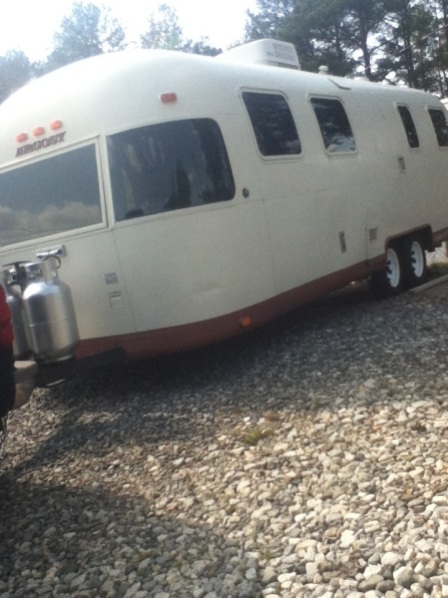
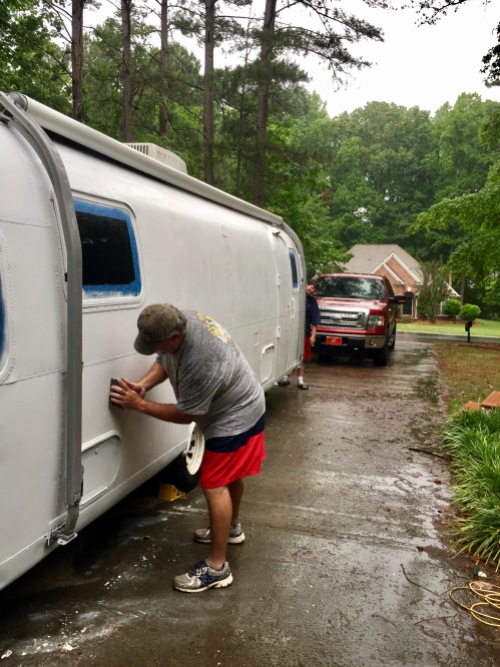
Paint Job at Time of Purchase
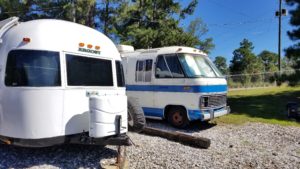
When we purchased our 1977 28 ft Argosy, the Seller’s said that it was recently professionally painted. The paint looked decent but it had a weird “chalky” texture that when you touched it, your finger had a white chalk substance. The rust color on the bottom was a different texture and just plain ugly. We knew we couldn’t afford an immediately paint job so we spray painted the banana wraps a deep green. The spray paint needed replaced at least once a year. We would highly recommend against the DIY Spray Paint method of painting your Argosy! You will need a million cans of spray paint to get it done and the finish does not last. With that said, we did spray paint our tiny Aristocrat trailer. That trailer will be under a cover 100% of the time and we wanted a small investment.
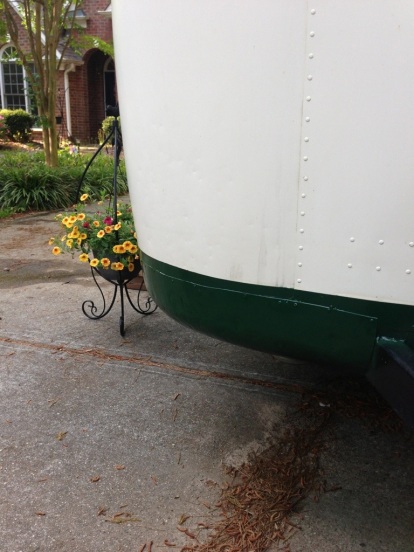
Our “Argosy Green”
Plan A
After months of research, we decided to purchase a Sherwin Williams product called Sher-Cryl. Unfortunately, Sherwin Williams refused to sell it to us and we had a debacle with their customer service. The sales clerk gave us so many lies, for days, and then the Manager basically told us to go somewhere else. Nice, huh??? Complained to Corporate and got nothing. They don’t want my money and now I don’t want to give them my money. Moving on to Plan B….
Plan B
“>

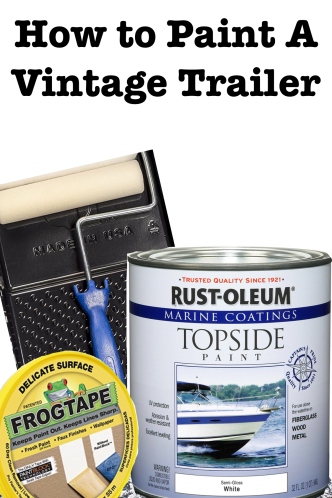
Gloss White Rustoleum Topside Paint
A few Argosy owners mentioned on Airstream bulletin boards that they used and loved Rustoleum’s Topside paint product. I had tried this product for our Argosy’s bathroom sink and was familiar with the product. It is sold in quarts with a few colors: Gloss White, Semi-gloss White, White, Oyster White, Sand Beige, Bright Red, Deep Green, Black, Navy, Battleship Grey. We chose Gloss White for the all over, Black for the Banana Wraps (to match the hitch) and a stripe of Deep Green around the middle. For those who read this blog, you already know that our 2017 Renovations is to turn our Argosy into a more “manly” fish camp as much as possible with only a few girlie touches.We picked the more masculine colors of Black and Green to fit the theme.
NOTE: For a more “Original” Argosy color scheme, buy the Gloss White for the top half and Oyster White for the bottom half. I would recommend Sand Beige for the bottom but many said it was coming out more buttery yellow than beige.
Here’s what we bought….
We bought 8 cans of Gloss White, 1 Can of Black, 1 Can of Deep Green and a Container of Mineral Spirits to thin the TopSide Paint. We ordered from Amazon since our local Home Depot and Lowes no longer stock it on their shelves. We also picked up a gallon of Zinser Primer from Walmart.
Obviously, what you buy is based on your needs. We bought black to paint the minimal banana wraps and green to paint the bottom half of our Argosy. We had a lot left over of both. Doing half and half on your Argosy? Buy four cans of both colors to complete your job.
We bought good quality foam rollers and tip brushes from Home Depot. Honestly, you don’t need our recommendation for which brand of rollers and brushes… just buy something that is good quality that does not “shed.”
Sandpaper: 300 grit for sanding prior to primer. 600 for in between coats of paint. 800 to 1000 after final coat of paint.
By the way, we pay for our products at full price.

All Taped and Primed
Here’s what we did….
After taping the Arogsy, we primered the entire body with the Zinser Primer.
Then the painting began. A few comments about us painting our Argosy:
- We did not have an ideal location to paint. We painted in our driveway (yes, our HOA hates us now). The HOA Police nailed us with a fine.
- We did not have a setup that prevented bugs from approaching our fresh paint.
- We painted in 80 degree weather not quite Hotlanta yet.
- Yes, some paint got on our driveway. Don’t sweat the small stuff.
- This is DIY. It will not be perfect. I had to keep telling my husband to “let it go” when he got angry over orange peel, bugs, neighbors, etc. It will be close to perfect but it will not be perfect.
Thinning the Paint….
We used Mineral Spirits to thin out the paint otherwise Topside is crazy thick. We did not add a hardener.
How many Coats of Paint?
We did four coats with sanding in between. We could have easily gotten by with three coats but our first coat was not with a Quality FOAM Roller so we got the dreaded orange peel.
You could try two coats but in our mind, we were already involved with the painting and an extra 3rd coat equaled “paint insurance” to us. We didn’t want to do this again anytime soon!
First Coat
For our First Coat, we emptied four cans of Gloss White Topside paint into a Homer Bucket with 1 quart of Mineral Spirits. We basically used the entire amount to paint the entire Argosy. We were hoping to get at least three to four full coats of Topside paint with 8 cans. We were able to get four full coats out of 8 quarts of Top Side and 2 quarts of Mineral Oil.
There were three main reasons we picked Topside Paint…
- Cost
- Glossy
- Self Leveling
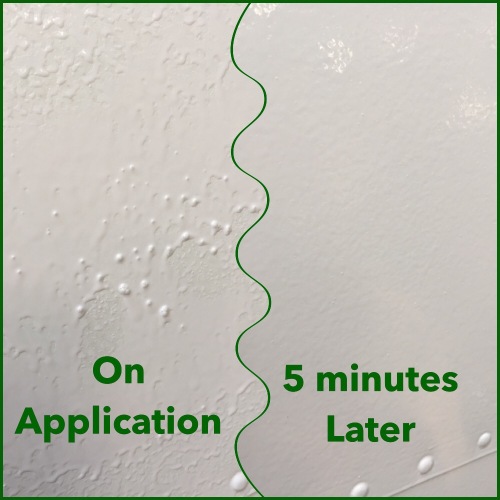
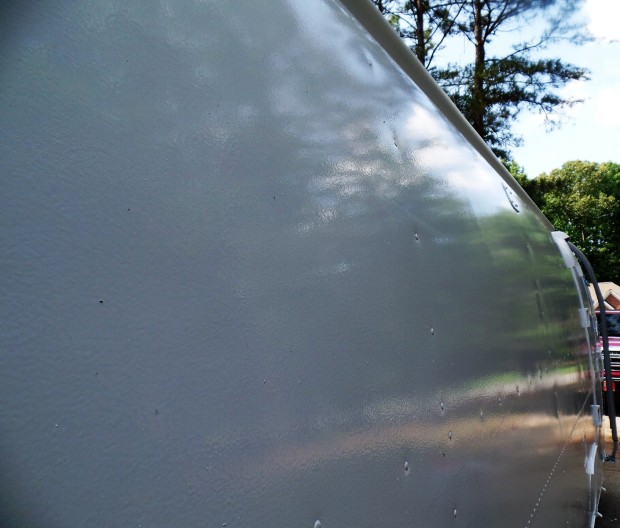
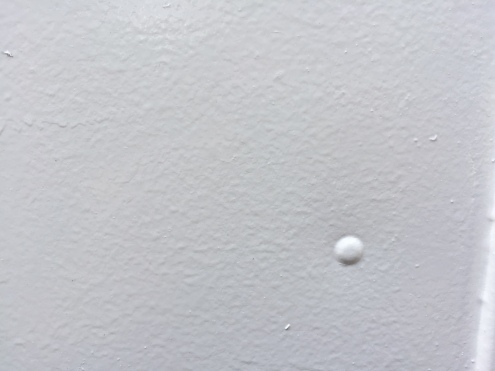
When we first started painting, we totally FREAKED OUT because of ALL the bubbles!!! If you notice the left side of this picture, you can see all those crazy bubbles. Left with no other choice, we kept painting. After 5 minutes, we went back to the spot we first painted and the bubbles disappeared! Going back to number 3, this paint is Self Leveling! We did not do one thing to get these bubbles to disappear!
There is a slight bit of “orange peel” that we wet sanded with 600 grit sandpaper (bought at an auto store) before we painted the second coat. We expect more orange peel after the second coat and will lightly sand again before buffing the entire Argosy. After wet sanding, the finish will become duller. Don’t worry, this is a necessary step.
The Arogsy is looking pretty after a first coat! This picture is not the best but you can see some of the Gloss Shine on top. In person, it is definitely glossy!
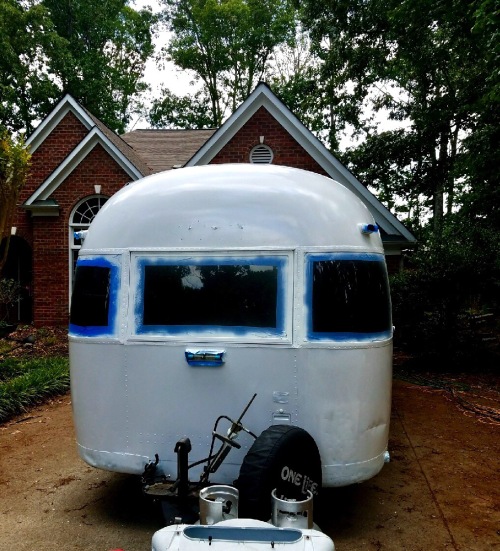
After first coat of Gloss White. Wow, the dents are showing!
Check out Our Spray Paint Review.
Wet Sanding in the Rain
In Atlanta, most Counties are under water restrictions. It has been that way for years. Two years ago, I was trading in my car for a new one and took all of 10 minutes to wash it off before going to the Dealer. Someone in our 30 home community turned us in to the Water Dept and we were heavily fined. So, since today was not “our specific and specified” water day, we decided to wet sand in the rain.
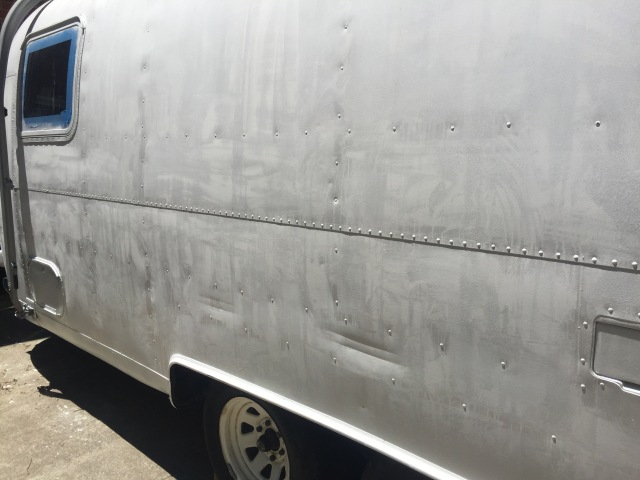
After First Coat and First Sanding
This is what our Argosy looks like after the first coat of Topside paint AND first wet sanding. Admittedly, I am not thrilled with it’s appearance but my husband says to trust him, it will look bright and shiny again. It’s a process. The next step is to apply the second coat of Topside paint.
- Dreaded Orange Peel
The second coat went on two days after the first coat and one day after sanding the first coat. I read a couple of posts about being able to scratch this paint off with a fingernail… we were not able to do that. The curing process seemed to take faster than expected. I made the above picture a bit darker so you could see the “dreaded orange peel” from using a roller. Click to enlarge to see what I am talking about. Although, the Argosy is super shiny right now, that will not last because we have to wet sand in between coats. Then the third coat.
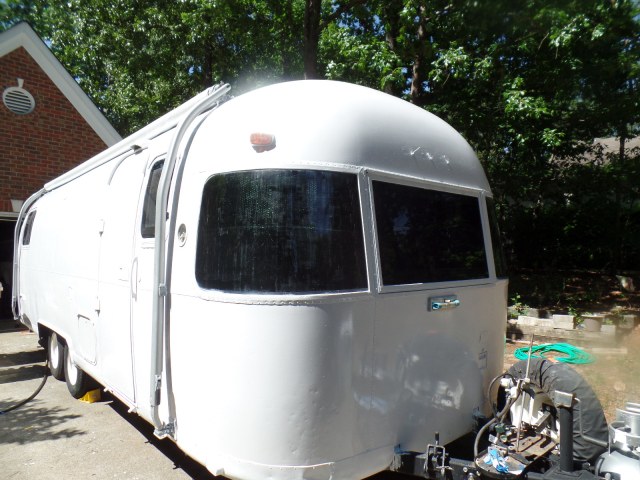
The “burst” at the top is where the sun hits the high gloss shine.
After the 3rd coat went on, the GLOSSY SHINE was unbelievable! The above picture does not do the shine justice. While taking off the painter’s tape from the windows, the sun hitting the white gloss paint was almost blinding. I had to switch to sunglasses just to remove the tape. This is exactly what I was hoping for!
Unfortunately, along with the fabulous shine also came the dreaded orange peel. The orange peel is practically everywhere and it is VERY noticeable within 10′. We will have to wet sand the entire trailer, paint the 4th and final coat of paint, light sand and then buff it back to a high shine. I doubt that we do as much sanding on the stripes we are adding at the bottom. They will be small and rocks and road dust will hit them that the orange peel should be hardly noticed.
Orange Peel: Extreme Closeup After 3rd Coat (it’s not that bad)
About that dreaded Orange Peel…. I can’t stand it. I tried living with it for three days and I still can’t stand it. It is not bad and most people would live with it. We have been told that if we let the paint setup for a week that it will level itself out. I do not see this massive amount of orange peel leveling itself out in a week or two. But, the heavy rains are back for a week and then we have a scheduled camping trip and that leaves zero opportunity to wet sand and then paint on a 4th coat, then lightly sand, then buff. To be honest, we are all tired of this project and just want it to be over. It is a lot of work!!! We have decided to take the Summer off from painting due to the heat and other activities. We will do the final 4th coat of paint, sand, buff late Summer/Early Fall. Who knows? Maybe the orange peel will magically disappear and save us from hours and hours of more sanding. We still highly recommend this product. We are not discouraged…. just exhausted and need a break.
Use Leftover Paint for Your Airstream/Argosy Bathroom!
4th Coat….
Guess what… the orange peel leveled out a bit and it really is not as bad as the picture above (the extreme close up). I did not photo document the 4th coat process. We just wanted to get it done. We let the paint setup for one week and then used Maquires polishing compound to buff the entire trailer. That’s all, folks! The shine is high, the rain beads up and it’s easy to wash. We do not store our Argosy covered and the paint job is holding up great!
Stripes:
We put a tiny bit of yellow Frogg painter’s tape on the trailer two days after the 3rd coat of paint so we could demonstrate where the Black paint will go. We didn’t press hard on the tape. In fact, we only pressed half of the tape width on the trailer. When we removed the tape…. off came three layers of paint. A lot of words were flying as well. So, if you are planning on doing stripes, plan on doing them at least three weeks after your final coat of paint. We decided against adding the green stripe.

Painting the Black Stripe
The following pictures show after the 4th coat of paint (3 wet sands) and final buffing with polishing compound.

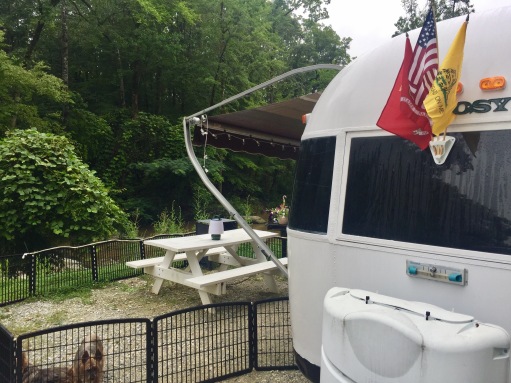
Night Camping & still has a shine!
Even in cloudy weather, it still has a shine!
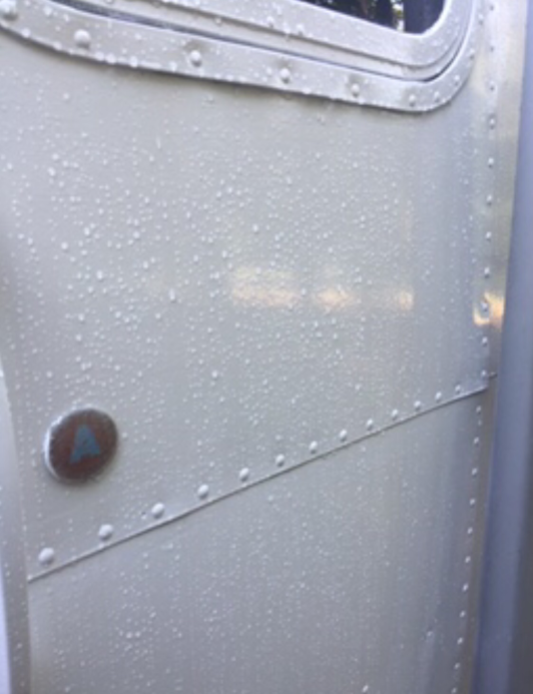
Water just beads off…. and still gets a shine!
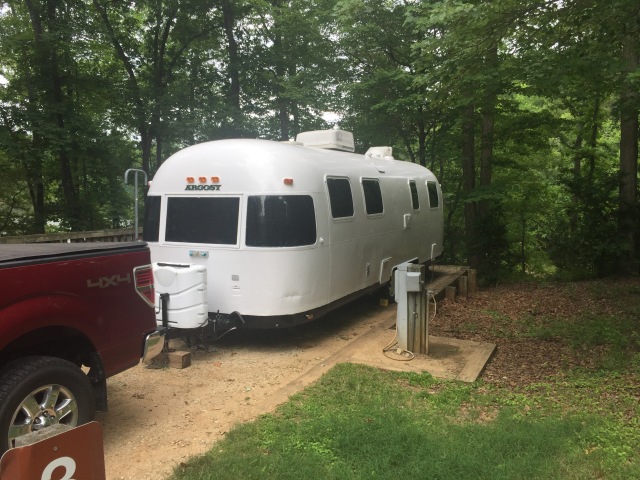
Dents really show with TopSide but even in cloudy weather, the shine is there!
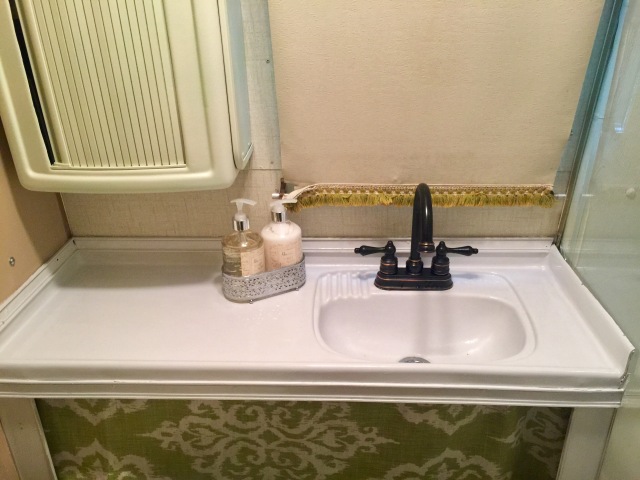
Leftover paint? Use it to repaint your sink top!
Lessons Learned:
Wait at least a month to paint stripes so the paint can truly harden.
You can not get away with not wet sanding. Just face it. It’s not that bad and it goes quick with music playing in the background.
You will need sunglasses due to the high gloss shine. I am not kidding!
You could probably get by with 3 full coats of paint and 2 wet sands. We decided to do 4 full coats because we had enough paint.
Topside is a great product. Stop looking for other products and trust us! If this is used for boats, you know this is going to work for our Vintage trailers!
![]()
Pinterest Us!

Update:
A Year Later and the Paint is still shiny, easy to wash and holding up.


Except…… There are two areas that are NOT holding up and starting to flake/peel: The Door Handle and a tiny section above the door directly underneath the awning. Out of the entire trailer, why are these two places the only ones that are starting to flake/peel? Because we did not prime those areas. We also did not sand them three times and paint them four times. We did not take the awning off to paint.
In hindsight, if we had taken the awning off, there would be no flaking/peeling because we would have sanded it three times instead of just a quick paint job there. The same for the door handle. The door handle is the flat part on the door, not the door handle to the right of trailer door. If we had taken the proper steps for these two areas, I doubt we found see any flaking or peeling.

Slight Peeling underneath the awning. If you look all the way up against the awning, you can see some flaking. This is the only area there that is showing (meaning – it is not showing anywhere else under the awning.) We will be sanding this entire area down, repainting it to correct our error.

Three years later:
Still High Gloss, No Chipping, No Orange Peel and Easy to Wash. We only just soap up and rinse off. We have not used wax or buff since we painted. And, we added another color of Topside Paint….

Click Here for full details, pictures and product information on our Two Color Argosy.
NOTE: We did NOT receive products for free to blog about painting our Argosy. Everything you see here, we paid for ourselves. Links are provided as a courtesy….we get zip, nada, nothing from Amazon or anyone else.


Love your work. We have a 1975 rear bed 28′ Argosy like yours. There is an aluminum rib rail around the middle. Did you take that off?
We did take off the “rib rail” on the outside. Our first Plan was to wrap the entire trailer & that rail needed to come off. But we didn’t like the look at the design stage so, we ended up with the Topside Paint job.
We just purchased a 1976 Argosy. We fell in love with the windows.
Started on the renovation last week. Found you on Pinterest while looking for instructions on how to make curtains. We will be painting the outside next year.
We live in Buford. Thanks for all the instructions and ideas!
Glad you found us! We are in Alpharetta so if you ever need a tool , etc, just let us know.
Even though I just finished our third set of curtains, I’m getting ready to ditch our front ones (and our gaucho slipcover) for a different pattern. We will be curtain buddies. Have fun w/the Reno!
Glad to see your post again. We are in Buford and purchased a ’76 28ft (like yours) and have some questions about painting it. Would love to hear y’alls advice!
Did you strip the argosy before priming. And what kind of zinser primer did you use?
We did not strip before priming because we bought it with primer (not painted yet). We did sand the primer before painting.
We use 123 Zinser Primer but when we repaint in the future (not anytime soon), we will strip and then use an automotive primer before painting. I do not have a name for one but would recommend talking to an automotive paint company.