That View! Do I really want curtains?
Update: We have seen new fancy curtains that are oh so easy to accomplish!
Since we bought our Airstream Argosy, I knew I would have to tackle sewing new curtains for the back panorama windows. The previous owner had sewn curtains with a striped pattern that just was not my style.
I procrastinated for three years. I searched Airforums, Pinterest, Instagram, dozens of blogs, the entire web for a solution, anything, other than sewing those annoying Airstream curtain tabs. All 90 of them. It came down to having no other choice but to sew those annoying Airstream curtain tabs. So, Tartaruga is getting new curtains!
Update: Read About Our New Sewn Curtains for our Airstream Argosy! Hints + Tips
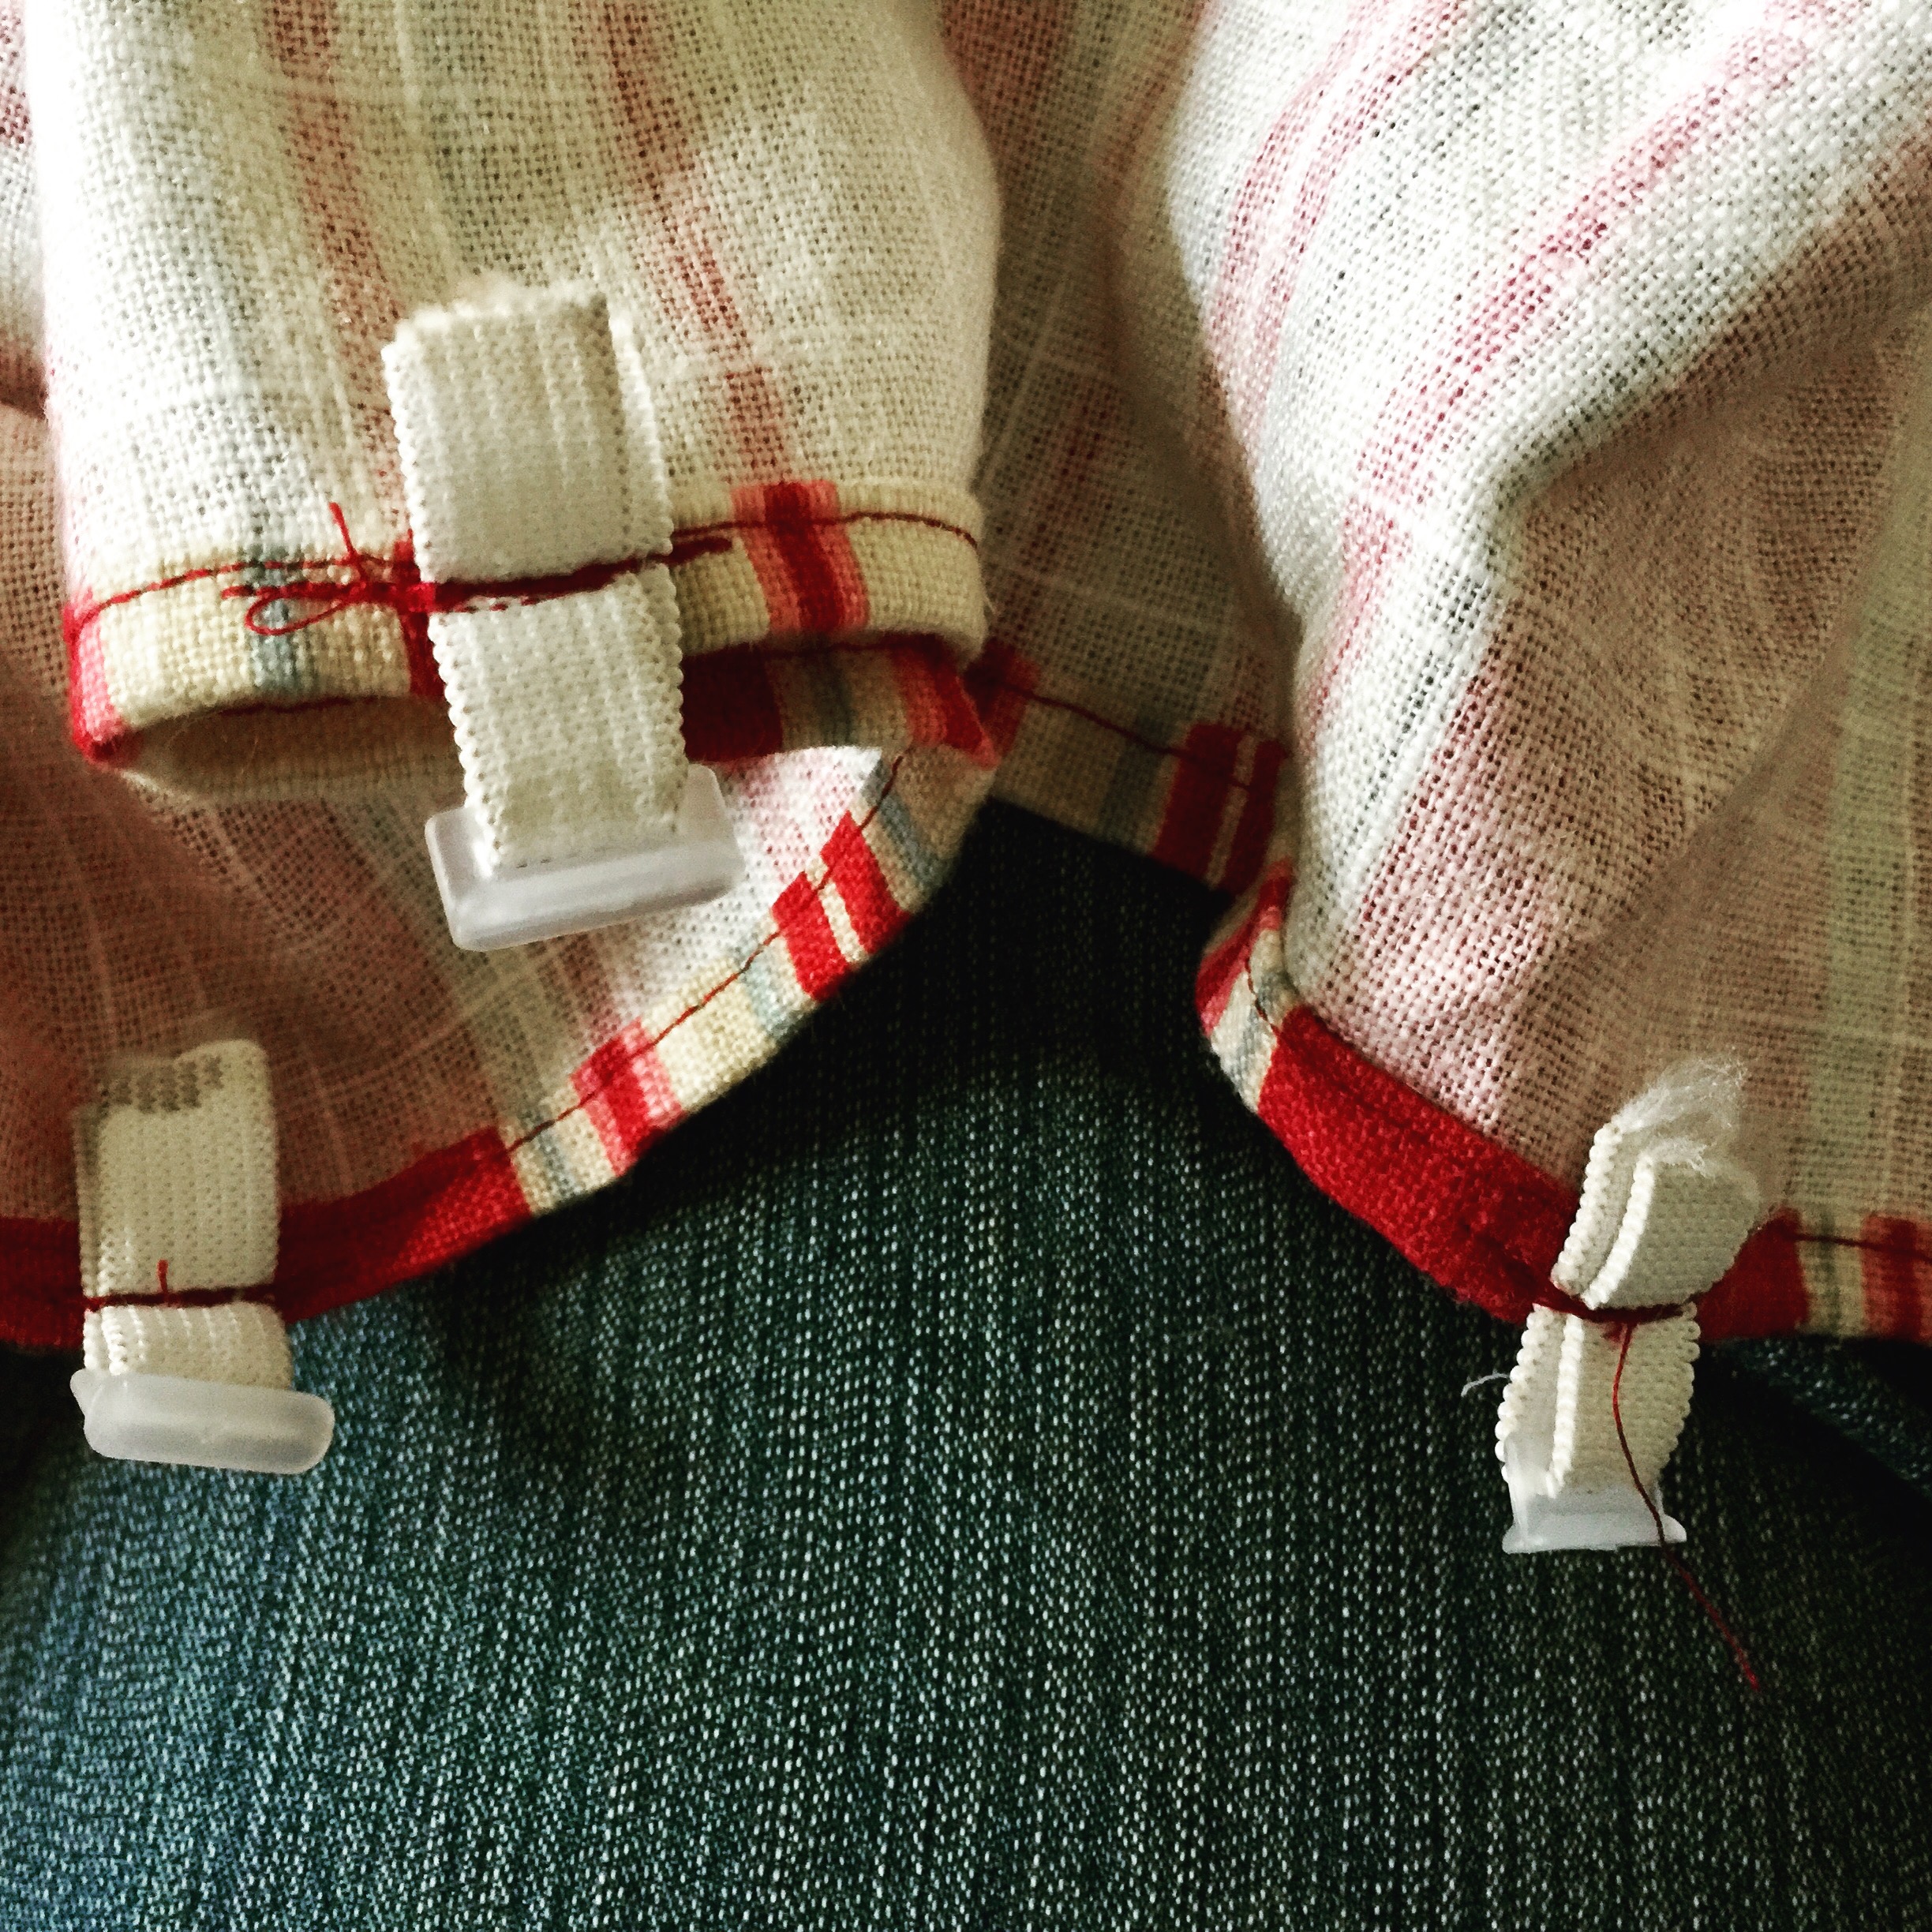
Original fabric and curtain hooks
Let me make this clear for my fellow sewing machine fearful pals, I do not sew. At all. Ever. I have my beloved Grandmother’s sewing machine (from 1950) and it makes a great decoration. My husband bought me a Brother SE-400 so I can embroider something every other year. IF I can do this, so can you!
I was extremely lucky that I actually kept the previous owner’s red striped curtains with attached Airstream curtain tabs. I was just about to purchase those tabs from Vintage Trailer Supply when my husband noticed and recommend I take a look inside a bin in the garage. Having these curtains not only gave me the tabs but the measurements for the fabric. A huge shoutout and thank you to the previous owner!

Curtains we bought & cut
Read Our Cheap Quick and Fabulous Fix for Shades in our Airstream Argosy!
Speaking of fabric. Two years ago, I had purchased Eclipse “Frisco” triple woven blackout curtains on sale at Walmart with the anticipation of cutting them up for my Argosy curtains. Actually, I stand corrected. At that time, my husband thought he would rig up a curtain rail system, shorten the curtains and hang them. The problem with that idea, and with every other non-Airstream curtain tab idea, was what to do with the hanging bottom due to the curved wall. Now, that I have convinced myself that I can sew, we cut up the curtains for the back panorama windows.

Clueless!
I literally had to text my friend, Kristi, who does sew, to ask which foot to use for basic sewing. I forgot that my sewing machine’s digital display tells me which foot to use. I mention all of this because, again, I do not sew. If I can do this project, you can too.
Looking at the top picture, the two side windows had the longest panel of fabric so they could wrap around from the side of the wall towards the back main window. The main window straight back (behind vase of pink flowers) has smaller panels.
Main Back Window (make 2 of these):
28 wide by 26 height
Corner Back Windows (make 2 of these):
48 wide by 26 height
* These are finished product sizes. Add for seam allowances.


Excuse the wrinkles.

FULL sun and these curtains do a great job of keeping it shady inside!
Sewing
1. After cutting your fabric to length, Press a seam around your cut edges. Since we used curtains, we only had to press a seam on two sides. The other two sides already had factory seams.
2. Sew your pressed seams. This is the easiest and quickest part of the entire project even with a cat and teenager inquiring on your activities.

Nick trying to decipher Daffodil’s curiosity.
3. Cut the braided elastic needed for the Airstream curtain tabs. I decided on 3″ strips. It was a totally random decision based on what I thought I could easily handle with the presser foot and needle of my sewing machine. I also didn’t want a lot of extra waste and bulk.
I used 9 Airstream curtain tabs for the top and 9 for the bottom for the two Main Window Panels. A total of 36.
I used 16 Airstream curtain tabs for the top and 16 for the bottom for the two Corner Window Panels. A total of 64.

All the supplies you need
4. Insert the braided elastic through the Airstream curtain tabs. Make sure that the “groove” is facing out (see picture above of old fabric) or you will have to re-do all of your work.
5. On the wrong side of your fabric, measure every 3 1/4″ and mark that spot for a tab placement. Note: Tabs ALWAYS go at each end of the top and bottom. You are measuring and marking the remaining seven tabs.
6. This is the tricky part: sewing the tabs on the curtain. I tried sewing these with the wrong side fabric towards me and it made a mess on the nice side. So, I flipped my fabric and blindly sewed the tabs on the curtain with the nice side facing me. I got a couple that were not even on the wrong side but they are sewed on tight and no one will ever know or see it.
Tips:
My machine has a reverse feature. I sewed forward on a tab, then reversed, then cut. I have read that some people continue to sew without cutting. I decided to cut because I can’t sew a straight line to save my life and I already had a hem line. I didn’t want two hem lines. It takes more time to position but I like the look. I also decided not to pin these prior to sewing. Again, after research, many recommended against it and, honestly, I didn’t have the patience for it. Pins were not needed.
Supplies
Eclipse Curtain Panel (2 were needed), 52″ x 84″ from Walmart.
Braided Elastic 3/8″, at least 6 yards, from Walmart. *Cheaper to buy at the store vs online.
Airstream Curtain Tabs from Amazon. This is the best place to buy and the tabs already come with the braided elastic!
UPDATE:
I recently made curtains for our front windows with decorative Blackout Curtains. Click through to see what they look like….they are BEAUTIFUL!