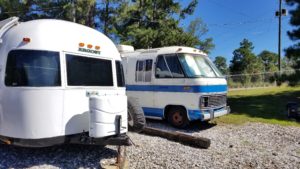
We have no problem keeping our Airstream Argosy tambours original…when it is woodgrain. It’s that ugly faded yellow tambour that just looks terrible and begs to be painted. Those old tambours did not age well.

There are a couple of options for painting the tambours: Spray Paint or Paint and Brush. We only recommend spray paint if you are removing the tambours from the trailer or Motorhome…. Or you did a gut job and spray painting the entire trailer or Motorhome. Spray Paint gets everywhere and can be an impossible mess to control and cleanup.
Whichever way you decide to paint, there is Prep Work that has to be done beforehand or else the paint will not last. Peeling paint is an incredibly challenging process to fix with tambour. Trust us when we say that prep work makes the finished work happen!
We wipe everything down with Tub o’ Towels, followed by wiping everything with disinfectant wipes. To be honest, you could probably just do one or the other. We love Tub o’ Towels for a deeper clean and to get paint off of surfaces and our hands. Next is the nasty step…. wipe everything down with TSP Mixture (USE GLOVES and MASK!) To remove grime, dirt, grease and that funky coating found on Airstream and Argosy (and some vintage trailers) walls. Do NOT use on bathroom tub or sink. There is NO going back after using TSP!!! Then on to painting….

A lot of people will tell you that a craft foam brush (those angled black cellulose foam on a stick brushes) work best but they don’t. They can not handle the wear and tear of brushing back and forth and usually “crack” or rip in the middle. It’s best to use a good quality angled paint brush. The coverage is better and it’s easy to get into the crevices of the tambour.

At first, go with a thin coat. Don’t load up your paint brush with gobs of paint. With a small amount of paint, the coat will self level just a bit. If too much paint is applied, it could affect the opening and closing of the tambour.

You are not going to get complete coverage with one or two coats. This is going to be a long process as you let each coat dry. Another good reason to thinly paint the tambours.
Probably the most important thing that I can recommend, besides the prep work, is to completely open each tambour after each coat of paint has almost dried. Otherwise, the paint can become like glue and make it challenging or impossible to open and close the tambour correctly.
Tip: After the 2nd coat of Paint, while still very wet, I took a toothpick and gently spread some paint into the inside ridges of the tambour. I found that once the paint was in those ridges, the 3rd coat seemed to adhere a little easier.
Our tambours took three coats of paint to completely cover the old yellow and to carefully get in between the cracks of the tambour.


Our “Go To” White Paint Color? Westhighland White. It is a great white that is not super bright and does not have a grey or beige tone on application. We use it at home and in our trailers. It was a Sherwin Williams paint chip but we refuse to buy from SW due to their incredibly poor customer service and rudeness. Luckily, Home Depot, Lowe’s and Ace have easily matched the paint color for us.

After you have finished painting the last coat of paint on the tambour, let it dry to 80% and open and close the tambour. Do this several times within the next 24 hours after your final coat of paint. This might be overkill but it helps in two ways: makes sure the tambour still opens and allows you to see spots that need touched up.
A long long time ago, two years to be exact, we painted the tambour in our Argosy Trailer with a different paint… Let’s just say it didn’t turn out how we thought. Click here to read about it!
Schedule some time and definitely try painting the ugly away from old tambours!


| | | |


